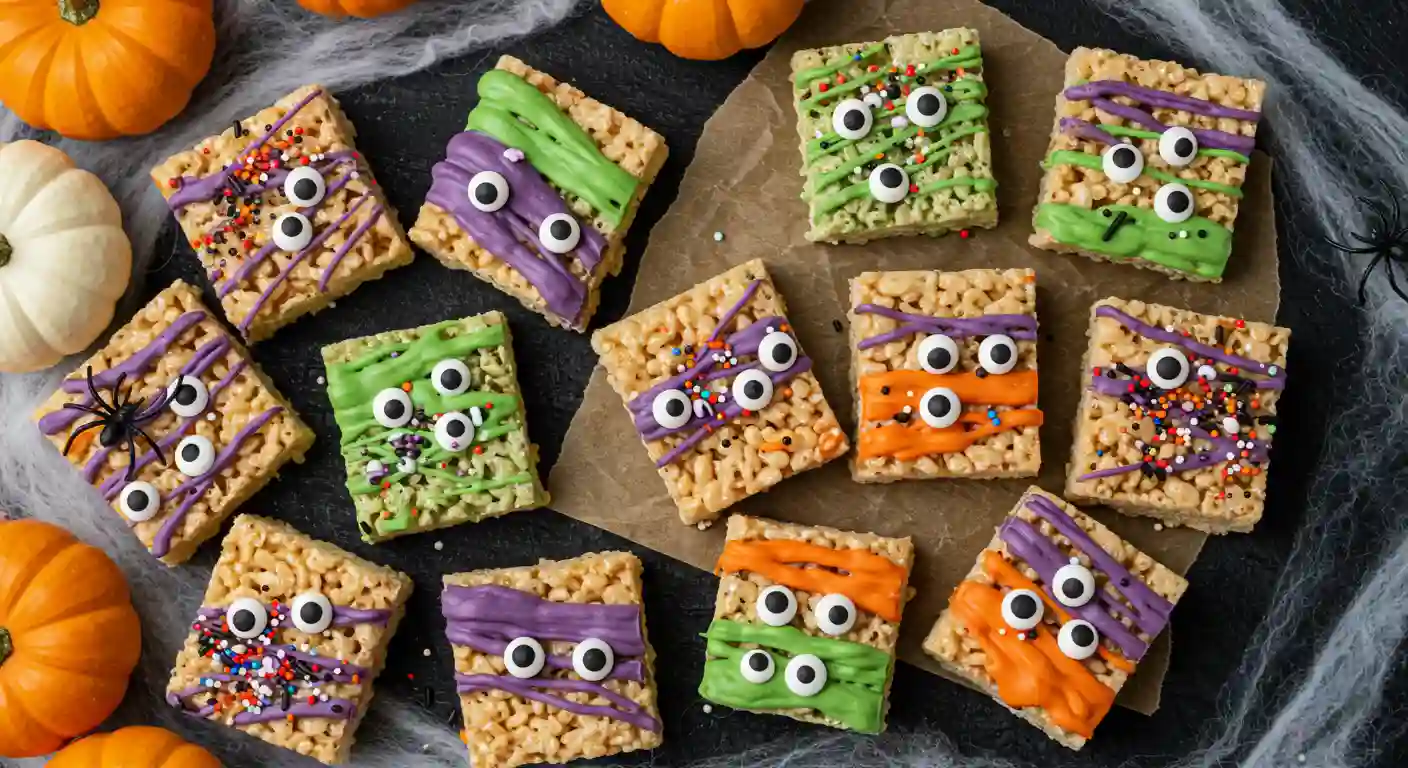
These Monster Rice Krispie Treats are a playful twist on a classic snack, dressed up with candy melts and candy eyes to look like colorful little monsters. They’re quick to make, require no baking, and add a spooky but fun vibe to any Halloween party table. Whether you start with homemade Rice Krispies or the shortcut of store-bought bars, this recipe comes together in minutes. Kids love helping with the decorating, making these treats both an activity and a dessert that’s as festive as it is delicious.
Why You’ll Love These Monster Rice Krispie Treats
These no-bake Halloween Rice Krispies are easy, vibrant, and guaranteed to delight. You only need a handful of pantry staples and some candy decorations to turn plain cereal bars into edible monsters. They’re customizable with colors, sprinkles, and multiple eyes, making them ideal for a themed party spread. Best of all, they’re kid-friendly, mess-free, and ready in under an hour, so you can whip them up without stress before trick-or-treaters arrive.
Print
Monster Rice Krispie Treats (Easy Halloween Dessert)
- Total Time: 40
- Yield: 12 treats
- Diet: Vegetarian
Description
Colorful monster Rice Krispie treats decorated with candy melts and candy eyes. A fun no-bake Halloween dessert for kids.
Ingredients
- 3 tablespoons unsalted butter
- 1 package (10 oz) mini marshmallows
- 6 cups Rice Krispies cereal
- 1 teaspoon vanilla extract
- Food coloring (green, purple, or other colors)
- Candy eyes
- Chocolate chips or melted chocolate
Instructions
1. Melt butter in saucepan, stir in marshmallows until smooth.
2. Add vanilla and food coloring, stir well.
3. Mix in Rice Krispies until coated.
4. Press mixture into greased 9×13 pan, cool 30 minutes.
5. Cut into squares or shapes.
6. Decorate with melted chocolate, candy eyes, and sprinkles.
Notes
- For crunch, mix mini chocolate chips or sprinkles before pressing into pan.
- Use different colors in batches for layered spooky bars.
- Prep Time: 10
- Cook Time: 10
- Category: Dessert
- Method: No-Bake
- Cuisine: American
Ingredients
When it comes to Monster Rice Krispie Treats, the magic is in the simple mix of pantry staples and fun decorations. You’ll start with the classic butter, marshmallow, and cereal base, then bring them to life with food coloring, candy eyes, and chocolate details. The best part is how easy it is to swap colors or toppings so every batch can have its own spooky personality.

Pantry & Fresh
| Ingredient | Amount |
|---|---|
| Unsalted butter | 3 tablespoons |
| Mini marshmallows | 1 package (10 oz) |
| Rice Krispies cereal | 6 cups |
| Vanilla extract | 1 teaspoon |
| Food coloring | Green, purple, or other Halloween colors |
| Candy eyes | As needed |
| Chocolate chips or melted chocolate | For decorating |
Substitutions
If you’re short on time, swap homemade bars for individually wrapped store-bought Rice Krispie treats. Gel food coloring works in place of liquid drops for more vivid shades. Candy melts can replace chocolate for dipping, and dairy-free margarine with vegan marshmallows makes these spooky Rice Krispies friendly for special diets.
How to Make Monster Rice Krispie Treats (Step by Step)

Melt the base
In a saucepan over low heat, melt butter. Stir in mini marshmallows until smooth, then add vanilla extract.
Add color
Stir in a few drops of food coloring until evenly blended. Divide batches if you want more than one color.
Mix with cereal
Add the Rice Krispies and stir until each piece is coated. Work quickly before the mixture sets.
Shape the bars
Press mixture into a greased 9×13 inch pan. Use a spatula or damp hands to press it flat. Cool for 30 minutes.
Cut and decorate
Slice into squares or shapes. Dip tops in melted chocolate or candy melts, add candy eyes, and finish with sprinkles for a monster look.
Pro Tips
To keep candy melts silky, stir in a teaspoon of coconut oil while melting. Chill decorated treats briefly so eyes and chocolate set fast. For an interactive party activity, set up a decorating station where kids can design their own monsters. Using parchment paper under cooling treats prevents sticking and makes cleanup simple.
Variations & Substitutions
Mini versions make great party bites, while adding sticks turns them into Monster Rice Krispie Pops. For a shortcut, stick to three ingredients: store-bought bars, candy melts, and eyes. For a layered effect, tint each batch a different color before pressing them into the pan. You can also mix in sprinkles or mini chocolate chips before shaping for extra crunch.
Serve It With
Pair these kid-friendly Halloween desserts with candy corn bark, ghost cupcakes, or mummy cookies for a themed dessert table. They go well with hot cocoa, apple cider, or a pumpkin milkshake for a festive fall touch.

Storage & Reheat
Keep treats in an airtight container at room temperature for up to three days. If your kitchen is warm, refrigerate them to prevent melting decorations. For safe storage practices, visit the USDA food safety basics.
Nutrition
Each monster treat has about 150 calories, 10 grams of sugar, and 5 grams of fat. With only 1 gram of protein and 24 grams of carbohydrates, they’re more of a fun seasonal dessert than an everyday snack.
FAQs
Yes, you can. Pre-wrapped treats save time and hold up well when dipped in chocolate or candy melts. Just unwrap, decorate, and serve.
Melt them gently using a microwave in short bursts or a double boiler. Stir in a little coconut oil or shortening to keep the texture shiny and easy to work with.
They stay fresh for about three days in a sealed container. Beyond that, they can harden, so it’s best to enjoy them while soft and chewy.
Yes, you can prepare them a day before your party. Decorate and store in an airtight container, but avoid stacking to keep the candy eyes in place.
More Like This
If you enjoyed these, try our Candy Corn Bark for another colorful no-bake dessert. Add Mummy Cookies for a treat with the same candy eye fun. Bake Halloween Brownies to round out your party table, or whip up Ghost Cupcakes for a fluffy themed dessert.
Save This Recipe for Later
These Monster Rice Krispie Treats are festive, spooky, and delightfully easy. Bookmark this page or pin it so you can come back to it when you’re planning your next Halloween bash.
