Introduction
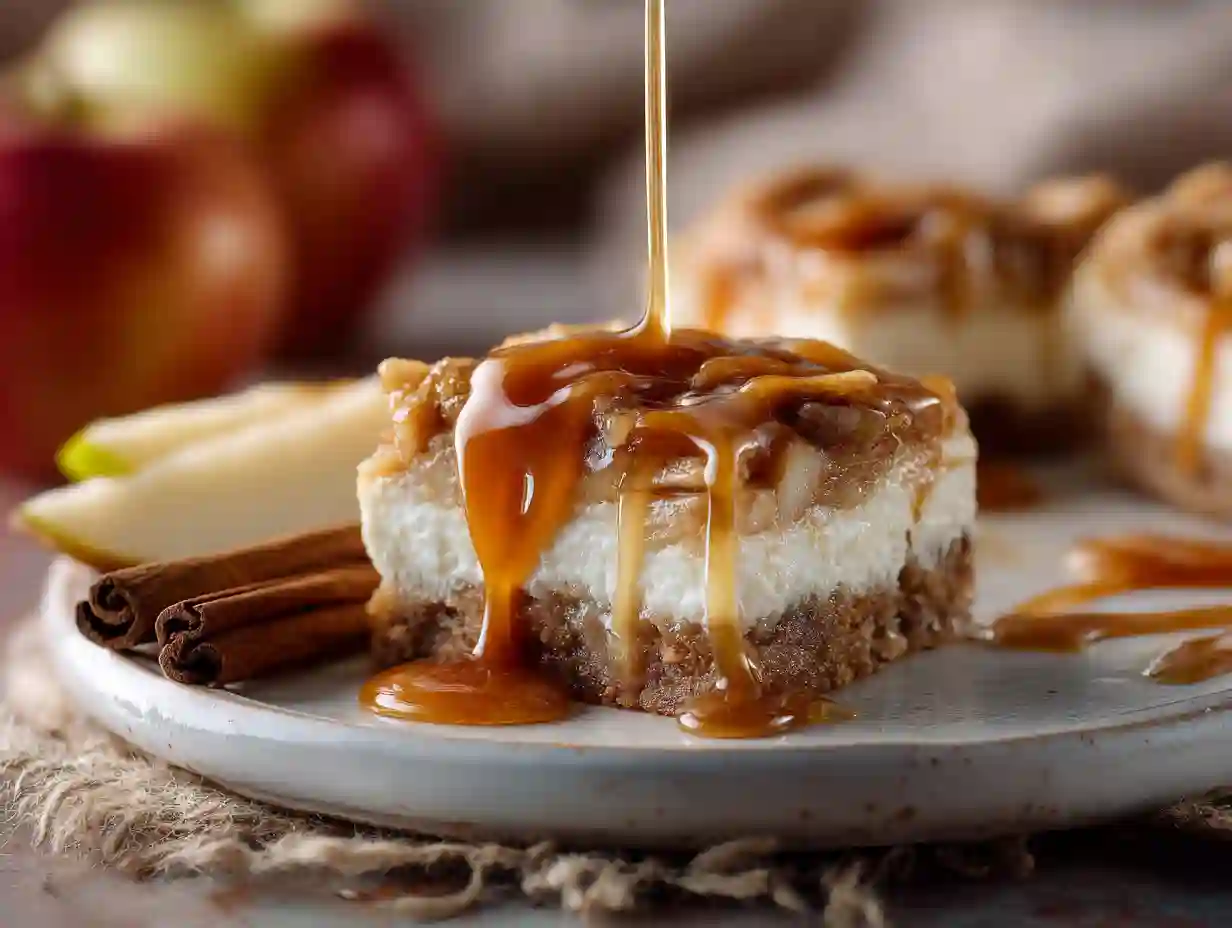
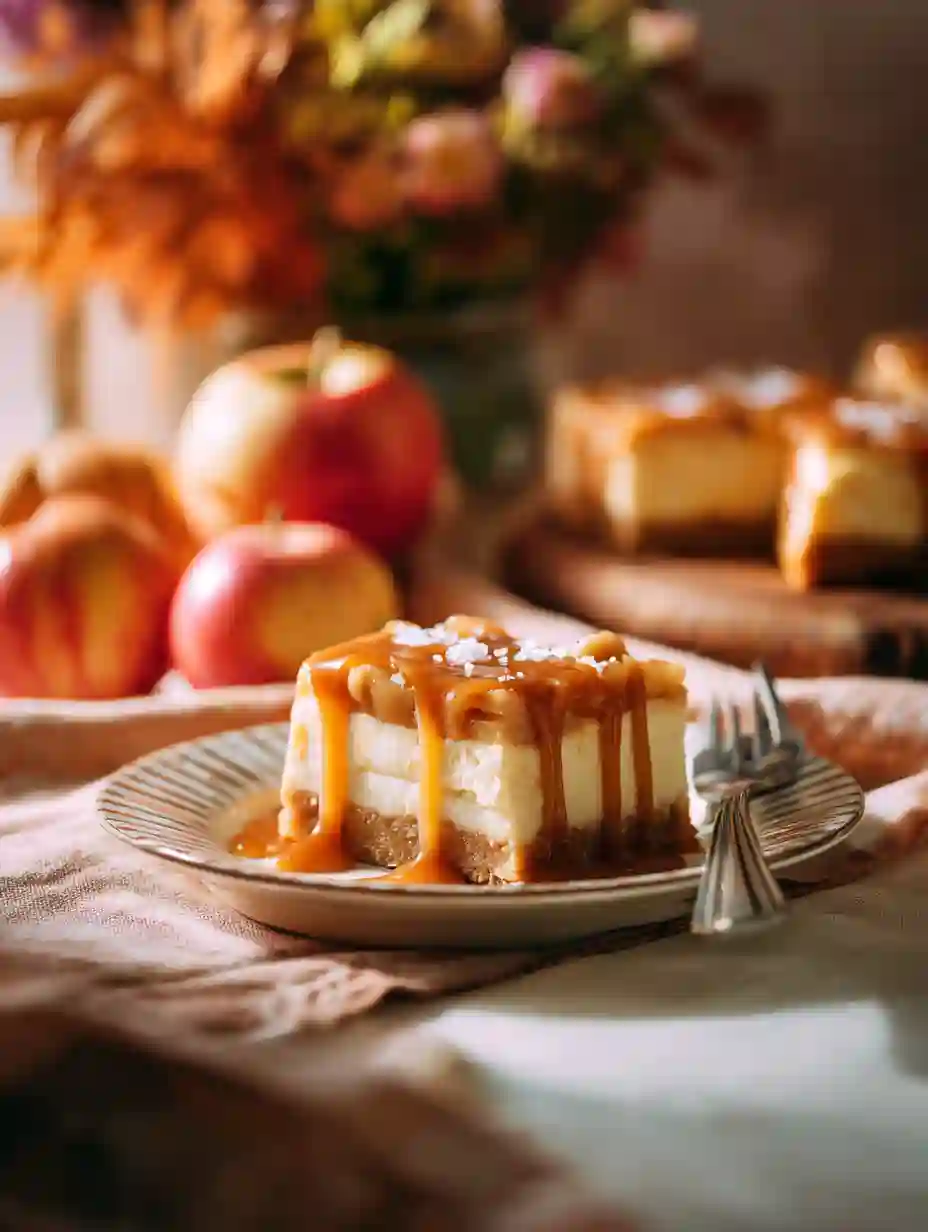
When Thanksgiving desserts start calling, these Caramel Apple Cheesecake Bars always answer sweetly. Imagine a buttery crust, velvety cheesecake layer, cinnamon-spiced apples, and a golden streusel crumble — all finished with ribbons of warm caramel. They bake up beautifully, smell like a cozy kitchen in autumn, and taste like the season’s best comfort in every bite.
Why You’ll Love It
Each layer of these Caramel Apple Cheesecake Bars works in perfect harmony: tender crust, creamy cheesecake filling, juicy apples, and buttery streusel crumble. Plus, the bars slice neatly and hold their shape beautifully, which makes them perfect for sharing at family gatherings. Whether you’re baking for a Thanksgiving crowd or treating yourself on a quiet fall evening, every bite feels warm, balanced, and comforting. In addition, they’re easy to prepare ahead and chill until dessert time — so you can enjoy stress-free holiday baking.
Print
Caramel Apple Cheesecake Bars
- Total Time: 70
- Yield: 12 bars
- Diet: Vegetarian
Description
Creamy cheesecake bars layered with cinnamon apples, crumbly streusel, and caramel drizzle — a cozy Thanksgiving dessert everyone loves.
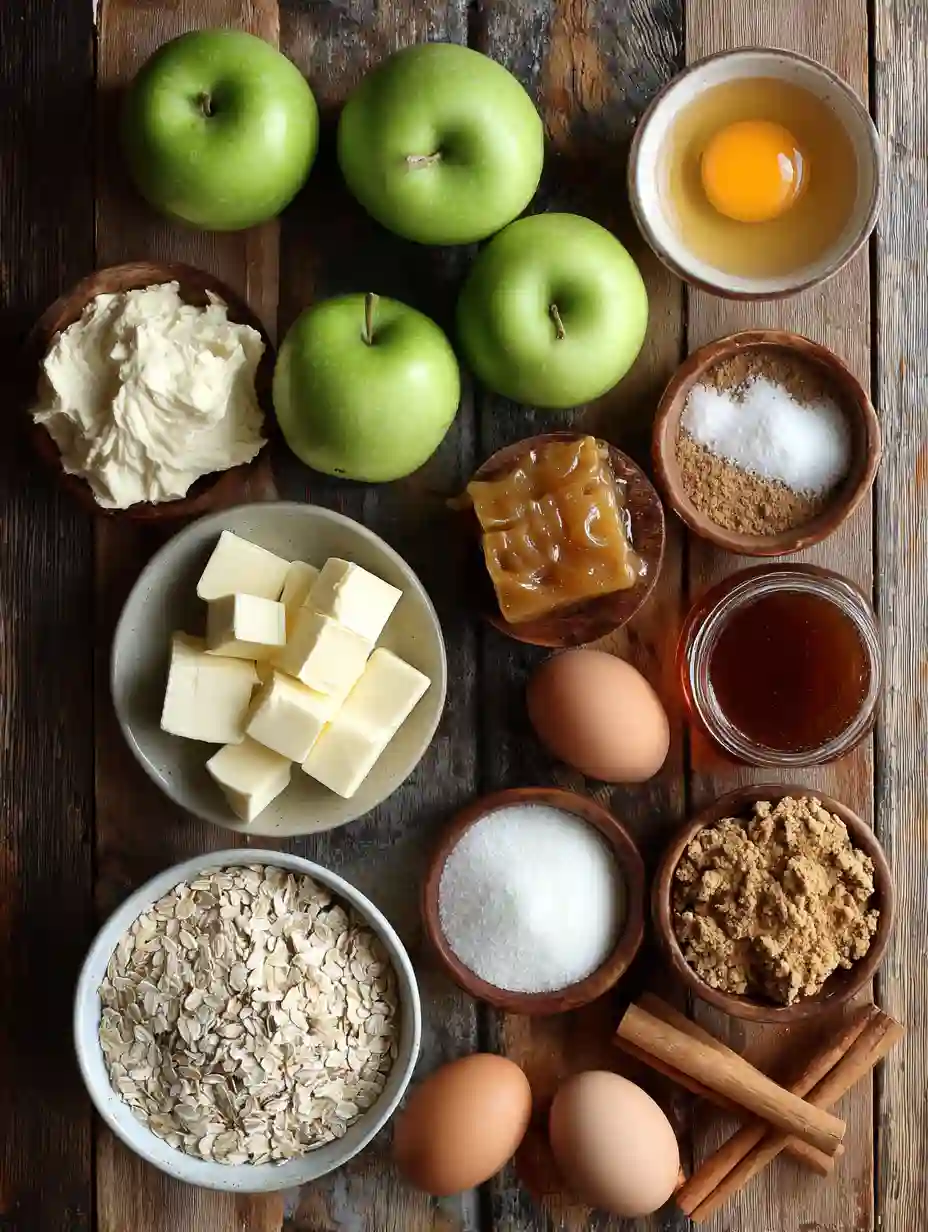
Ingredients
Crust:
- 2 cups all-purpose flour
- 1/2 cup firmly packed brown sugar
- 1 cup butter, softened
Cheesecake Filling:
- 3 (8 oz) packages cream cheese, softened
- 3/4 cup sugar
- 3 large eggs
- 1 1/2 teaspoons vanilla extract
Apples:
- 3 Granny Smith apples (about 3 cups), peeled, cored, finely chopped
- 2 tablespoons sugar
- 1/2 teaspoon ground cinnamon
- 1/4 teaspoon ground nutmeg
Streusel Topping:
- 1 cup firmly packed brown sugar
- 1 cup all-purpose flour
- 1/2 cup quick cooking oats
- 1/2 cup butter, softened
Drizzle:
- 1/2 cup caramel sauce (for topping after baking)
Instructions
1. Preheat oven to 350°F (175°C). Combine flour and brown sugar for the crust. Blend in softened butter until crumbly, then press into a greased or lined 9×13-inch pan. Bake for 15 minutes, until lightly golden.
2. Using a mixer, blend cream cheese and sugar until creamy and lump-free. Add eggs one at a time, then stir in vanilla. Pour the filling evenly over the warm crust.
3. In a small bowl, toss diced apples with sugar, cinnamon, and nutmeg until coated. Spoon apples evenly over the cheesecake layer.
4. Combine brown sugar, flour, oats, and butter by hand until crumbly. Sprinkle evenly over the apples.
5. Bake for 40–45 minutes, until the center is set. Cool completely on a rack, then chill at least 2 hours.
6. Warm caramel slightly and drizzle over chilled bars. Let rest 10 minutes, then slice and serve.
Notes
Use Granny Smith or Honeycrisp apples for the best flavor balance. Chill bars before slicing for neat edges. For extra flavor, add a pinch of sea salt to the caramel drizzle.
- Prep Time: 25
- Cook Time: 45
- Category: Dessert
- Method: Bake
- Cuisine: American
Ingredients
Pantry & Fresh
| Component | Ingredient & Amount |
|---|---|
| Crust | 2 cups all-purpose flour; ½ cup firmly packed brown sugar; 1 cup butter, softened |
| Cheesecake Filling | 3 (8 oz) packages cream cheese, softened; ¾ cup sugar; 3 large eggs; 1½ tsp vanilla extract |
| Apples | 3 Granny Smith apples (about 3 cups), peeled, cored, and finely chopped; 2 Tbsp sugar; ½ tsp cinnamon; ¼ tsp nutmeg |
| Streusel Topping | 1 cup packed brown sugar; 1 cup flour; ½ cup quick oats; ½ cup butter, softened |
| Drizzle | ½ cup caramel sauce for finishing |
Substitutions
Use Honeycrisp apples if you prefer a sweeter bite. Alternatively, gluten-free flour can replace regular flour one-for-one. For a lighter texture, use Neufchâtel cream cheese. If dairy-free, plant-based butter and almond-based cream cheese hold structure and taste surprisingly close to the original.
Step-by-Step
Step 1: Preheat & Make the Crust
First, preheat your oven to 350°F (175°C). Combine flour and brown sugar in a medium bowl. Next, blend in the softened butter using a pastry blender or two forks until crumbly. Press firmly into a greased or parchment-lined 9×13-inch pan. Bake for about 15 minutes, until lightly golden.
Step 2: Prepare the Cheesecake Filling
Using a hand or stand mixer, blend cream cheese with sugar until creamy and lump-free. Add eggs one at a time, mixing gently after each, then stir in vanilla. After that, pour the mixture evenly over the warm crust.
Step 3: Make the Apple Layer
Toss diced apples with sugar, cinnamon, and nutmeg in a small bowl until evenly coated. Then, spoon them gently over the cheesecake mixture, spreading for an even layer. This helps ensure each square has a perfect balance of apple and cream.
Step 4: Add the Streusel
Combine brown sugar, flour, oats, and butter by hand until coarse crumbs form. After mixing, scatter the crumble evenly over the apples so every inch gets some buttery crunch.
Step 5: Bake and Chill
Bake 40–45 minutes, until the filling looks set in the center. Then, transfer to a cooling rack. Let the bars cool completely, and refrigerate for at least 2 hours — or overnight for clean slices.
Step 6: Add the Caramel Drizzle
Warm the caramel sauce slightly so it pours smoothly. Drizzle over the chilled bars in ribbons. Finally, let it rest for 10 minutes before slicing and serving. A light sprinkle of flaky salt makes a beautiful finish.
Pro Tips
For the creamiest texture, always start with room-temperature cream cheese and butter. Next, mix the filling gently — less air keeps your Caramel Apple Cheesecake Bars smooth and free of cracks. Then, chill the baked bars thoroughly before slicing so each square stays neat and picture-perfect. Finally, drizzle the caramel just before serving to give every bar that glossy, irresistible finish your guests will love.
Variations & Substitutions
Add chopped pecans or walnuts to the streusel for extra crunch. Swap caramel for maple glaze for a cozy twist. If you’d like to lighten things up, bake half the recipe in an 8×8 pan and top with whipped cream instead of caramel. Additionally, a pinch of cardamom brings warmth and fragrance that complements apples perfectly.
Serve It With
These bars pair beautifully with chai tea, warm cider, or vanilla lattes. Alternatively, serve alongside pumpkin pie or this Thanksgiving Desserts Pumpkin Cheesecake Bars for a rich, festive pairing. If you prefer something savory to balance all that sweetness, the Cranberry Pecan Cheese Ball Recipe makes a perfect holiday appetizer.
Storage & Reheat
Keep leftover bars sealed and chilled, best within five days. For longer storage, freeze individually wrapped slices for up to 4 months. Thaw overnight and drizzle fresh caramel before serving. As always, refrigerate dairy-based desserts promptly — see USDA Food Safety Tips for official information on safe storage and handling.
Nutrition
Each bar offers about 360 calories, 21g fat, 38g carbs, and 5g protein. Apples lend natural sweetness, while oats add texture and fiber. Because this dessert is rich, a small square satisfies even strong sweet cravings.
FAQs
What is the best pan to use for cheesecake bars?
A 9×13-inch pan works perfectly. Metal gives crisp edges, while glass distributes heat evenly. Also, line with parchment for easy lifting and clean cuts.
How can you stop caramel from slipping off apples?
Cool the bars completely first. When the base is chilled and caramel is slightly warm, it sets quickly and clings beautifully.
Which apple varieties work best for dipping into caramel?
Crisp, tart apples like Granny Smith, Fuji, or Honeycrisp are ideal. Because they stay firm, the caramel coating holds without softening the fruit.
What kind of apples are best for cheesecake?
Granny Smith adds tang, while Braeburn or Fuji brings gentle sweetness. Mixing both gives the best balance of flavor and texture.
More Like This
Try Melt-in-Your-Mouth Snowball Cookies for a festive bite, or bake the Honey Banana Bread Recipe for a cozy treat. For something a bit more indulgent, the Ultimate Pumpkin Chocolate Brownies never disappoint. Meanwhile, Baby Pancakes Apple Surprise ties in the apple theme for brunch the next morning.
Save This Recipe for Later
Pin these Caramel Apple Cheesecake Bars to your Thanksgiving dessert board so you can bake them again next year — they’re a guaranteed family favorite. Plus, they freeze beautifully, which means you can prepare them early and enjoy a stress-free holiday week. That way, your kitchen stays calm, and dessert is ready whenever you need it — just slice, drizzle, and serve.